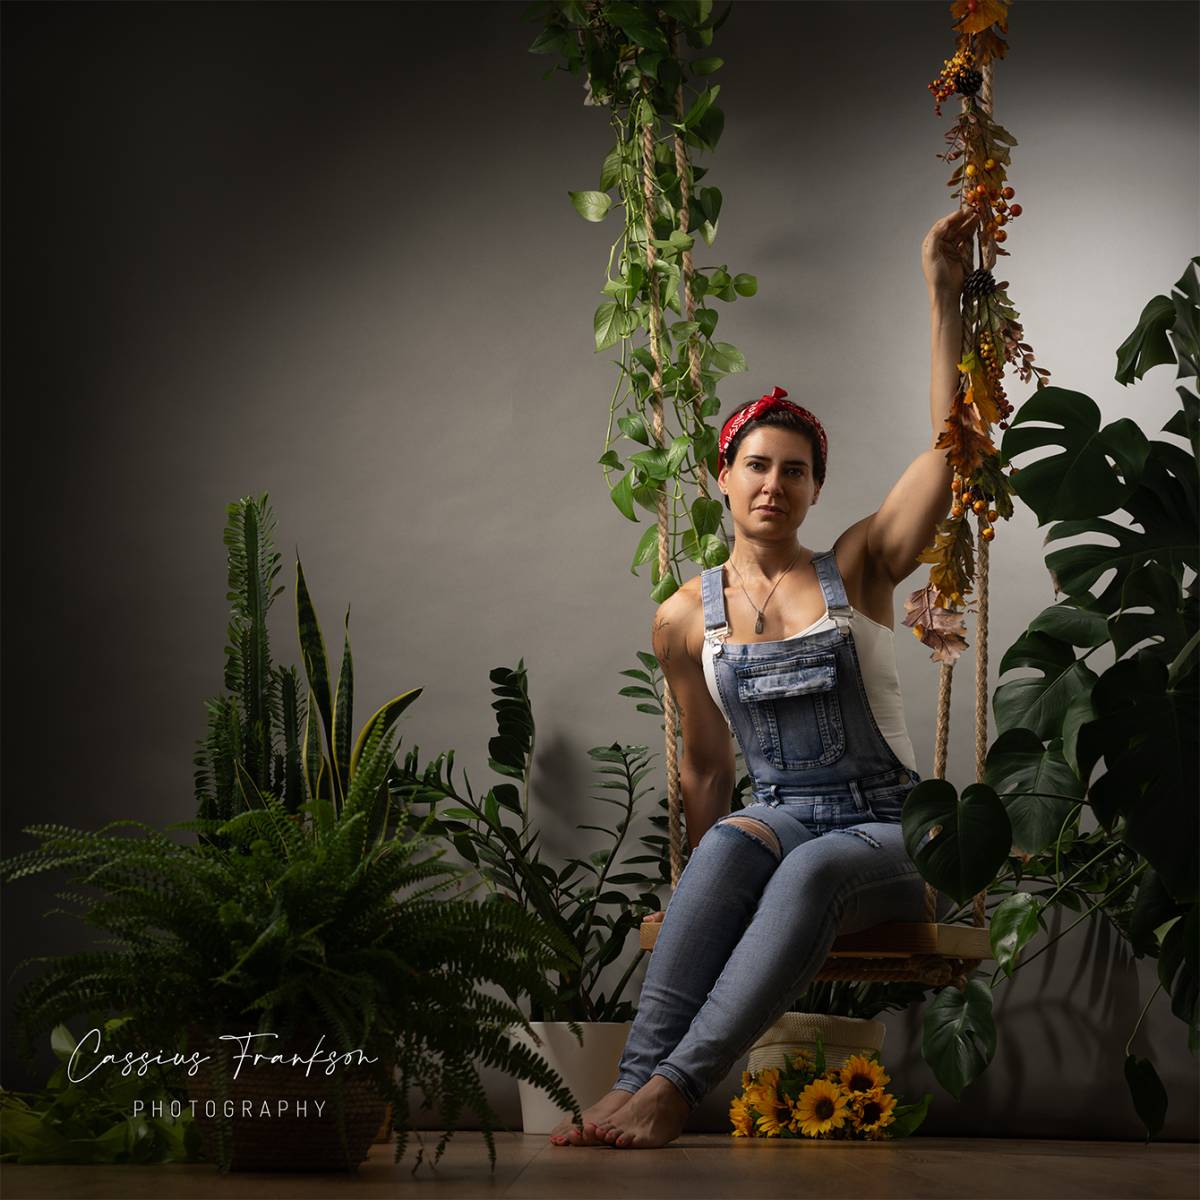
Photography is all about capturing beauty and emotion, and what could be more picturesque than a lush green oasis paired with a charming wooden swing? In this blog, we'll guide you through the process of crafting a rustic wooden swing and transforming your house plants into a captivating backdrop for a model photoshoot. Let's dive into this creative adventure!
**Building the Wooden Swing**
**Materials You'll Need:**
- A sturdy wooden plank (24x8.5 inches)
- Strong rope
- Pencil
- Drill with a suitable drill bit
- Electric saw
- Sandpaper
- Measuring tape
**Step 1: Select Your Wooden Plank**
Begin by choosing a piece of wood that's both durable and visually appealing. Cedar, oak, or reclaimed barn wood are excellent choices for a rustic look.
**Step 2: Measure and Cut**
Measure and mark the desired length for your swing, typically 6 to 8 feet. Using a saw, carefully cut the plank to your desired length.
**Step 3: Sand and Smooth**
To prevent splinters and create a polished finish, sand the edges and surfaces of the wood thoroughly. Start with coarse-grit sandpaper and finish with a finer grit for a smooth touch.
**Step 4: Drill Holes**
At each end of the plank, drill evenly spaced holes, about 1 to 2 inches from the edge. Ensure the holes are big enough to thread your rope through.
**Step 5: Thread the Rope**
Cut two lengths of strong rope, each about twice the height at which you want the swing to hang. Thread one end of each rope through the holes from the bottom of the plank to the top. Tie secure knots to hold the rope in place.
**Step 6: Hang the Swing**
Find something sturdy, I used a scaffold pole attached to the beams in my home studio to hang my swing from. Securely knot the free ends of the ropes over your chosen support structure. Make sure the swing hangs level and securely before use.
**Creating the Green Oasis**
Now that your swing is ready, let's transform your house plants into a lush green oasis to complement your photoshoot.
**Materials You'll Need:**
- Houseplants (a variety of sizes and types)
- Plant stands or shelves
- Pots and planters
- Potting soil
- Decorative rocks or pebbles
**Step 1: Select Houseplants**
Choose a mix of houseplants with different shapes, sizes, and textures. Consider maybe using varieties with vibrant colours and interesting foliage to add visual interest.
**Step 2: Arrange and Pot**
Arrange your plants on floor, plant stands or shelves, varying their heights and positions. Repot them into decorative containers using fresh potting soil.
**Step 3: Add Decorative Touches**
To enhance the oasis vibe, you can maybe scatter decorative rocks or pebbles around the base of the plants. This adds a natural, outdoorsy feel to your indoor garden.
**Step 4: Create Ambiance**
Things you can also think about. To enhance the atmosphere of the garden you can try placing soft, diffused lighting around your green oasis. Fairy lights or warm-toned lamps can work wonders in setting the mood.
With your wooden swing and lush greenery in place, you're now ready for a captivating model photoshoot. The juxtaposition of nature and rustic charm will make for stunning visuals, capturing the essence of both beauty and serenity. Remember to prioritise safety during the photoshoot, and enjoy the magical moments you create in your green oasis. Happy shooting!